

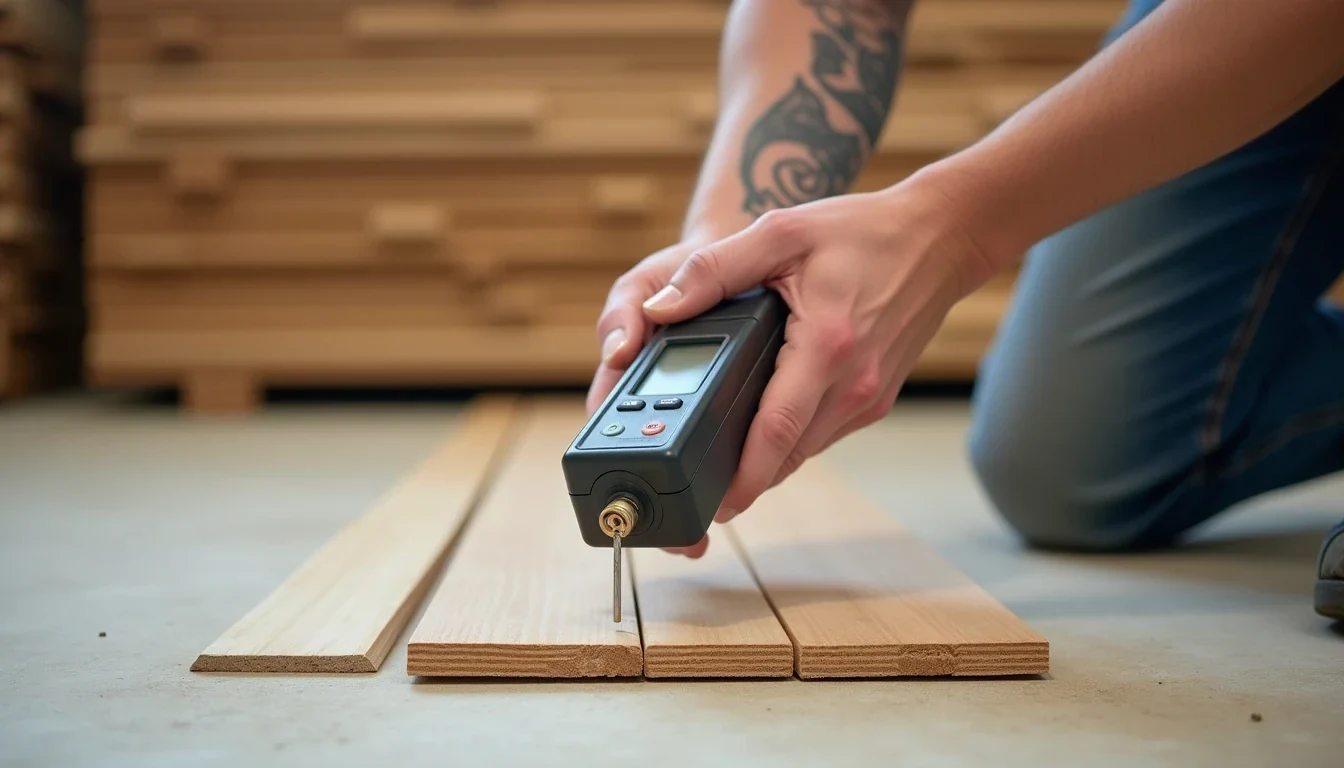
Timber floors fail early because someone guessed the moisture instead of measuring it. The board that cups in the first wet season did not suddenly become unreliable after installation. It was already carrying the problem when it arrived on site, or the slab under it was still wet, or the room air was nowhere near the condition the floor would actually live in.
Wood keeps trading moisture with the air around it. It swells when it picks up water vapor and shrinks when it loses it. Install it at the wrong moisture content, trap it over a slab that is still drying, and you have built a movement problem into the floor before the first skirting goes on. Cupping, gapping, and crowning are usually not mysteries. They are receipts.
Wood moves because the building moves
A timber floor is never static. It is a natural material with a cell structure that takes on and gives off moisture until it settles close to the conditions in the room. If the air is humid, the boards absorb moisture and expand. If the air dries out, they release moisture and contract.
That movement is not equal in every direction. Boards change width far more than they change length. Floors complain in the form of edge lift, open joints, and surface distortion rather than simply getting longer or shorter on the tape measure. A 100 mm oak board can shift by 1 mm or 2 mm across its width with a 5% change in moisture content. That is enough to make a floor look tidy in April and tired by August.
There is also a ceiling point in the wood itself. Once timber is above its fiber saturation point, roughly 25% to 30% moisture content, extra water lives in the cell cavities and does not yet drive shrinkage or swelling the way bound moisture does. Below that point, changes start showing up as movement. A floor can look fine in the crate and still misbehave once the building starts heating, cooling, and breathing around it.
Measure the timber before you trust it
The first mistake is opening sealed packs on the day of installation and calling that acclimatization. Packed timber is not the same as timber that has found its place in the building. It needs to be checked against the site, not simply unwrapped and hoped for.
On the coast, timber for internal flooring usually needs to sit around 9% to 12% moisture content. In drier inland conditions, 6% to 9% is the cleaner target. These numbers reflect the moisture level the floor is likely to live at once the house settles into its normal indoor climate.
The difference matters in practice. A Cape property with damp winters and salty air will push timber in a different direction from a dry Gauteng house where winter heating can strip moisture from the room. If you install both with the same moisture target and the same patience, one of them will punish you later.
Do not guess by feel. Use a moisture meter on the boards themselves and check more than one pack. If the timber has been delivered from a supplier warehouse into a site that has open windows, wet plaster, or fresh screed, the readings can drift fast. The floor should only go down once the timber moisture content has stabilized at the range appropriate to the location and the indoor conditions.
The slab tells the other half of the story
A timber floor answers the air and whatever is coming up from the slab. A concrete base that still holds construction moisture is one of the quickest ways to create cupping from below. The top face of the board stays drier than the underside, the underside swells first, and the edges start lifting.
The slab must be measured before installation, not assumed dry because it looks pale. A calcium carbide test should come in below 2.5% moisture content. An in-situ relative humidity probe should read under 75% RH. If those numbers are not there, the slab is still feeding the floor moisture.
The old rule of thumb of roughly one month per 25 mm of slab thickness gives a rough drying timeline, but it is only a rough guide. Mix design, ventilation, weather, adhesive choice, and site protection all change the result. I have seen slabs that looked ready on paper and still pushed a new timber floor into trouble because nobody checked what the moisture was actually doing.
If the slab is damp, a moisture barrier or an installation system designed for that condition becomes part of the specification. Leaving that decision to site instinct is how you buy a future sanding bill.
Room conditions have to match the floor
Timber needs the room to be in working order before it goes in. That means the air temperature and relative humidity in the space, not just the weather outside the window. A sensible indoor target sits around 40% to 60% relative humidity and 18°C to 24°C. Those conditions should be steady for at least 72 hours before installation, during the install, and for 72 hours after when the floor is glued down.
Site discipline gets tested here. Fresh plaster, unvented rooms, wet cleaning, and sealed homes without HVAC all distort the numbers. If the room air is too wet, the floor takes in moisture and grows. If the room air is too dry, especially in inland winter conditions or underfloor heated rooms, the boards lose moisture and open up between joints.
Underfloor heating deserves its own warning. It dries the air above the slab harder and faster than most people expect. In those rooms, timber should usually be installed nearer the lower end of the moisture range, around 6% to 8%, and only with the right adhesive and fixing method. Ignore that and the floor will spend its life chasing the heating cycle.
Coastal Cape and dry inland homes are not the same job
Cape properties and inland homes should not be handled with one universal acclimatization rule. The climate difference is too blunt for that.
A coastal house in Cape Town is dealing with humid air, seasonal swings, and damp winter conditions. Timber there generally needs a longer adjustment period, often 7 to 14 days, with the packs stacked on stickers so air can move around them. The floor also needs more room to move, with expansion allowance commonly set around 12 mm to 15 mm per 10 m width.
A dry inland house in Johannesburg or Pretoria usually behaves differently. The air is drier, winter humidity can drop sharply, and the timber may only need 3 to 7 days to settle. Expansion allowance can often sit around 8 mm to 10 mm per 10 m width because the movement range is smaller. This does not mean the floor is safer. It means the risk changes shape. A board installed too wet in a dry interior will lose moisture and leave open joints. A board installed too dry on the coast can swell after the first humid spell and start pressing against walls and trims.
Species choice also plays into this. Meranti and Saligna tend to behave more steadily when conditions swing. Kiaat can be more reactive. If the job is in a place with sharp seasonal shifts or poor climate control, that choice is part of the floor system.
Cupping starts before the finish coats go on
Cupping is the board telling you the underside has been wetter than the top for long enough to bend the profile. Crowning is the opposite shape, usually after a cupped floor has been sanded flat too early and then dries out unevenly. Gapping shows up when boards shrink after installation because they were laid too wet for the room they ended up in.
All three failures are expensive because they are symptoms, not isolated mistakes. The bad choice was usually made earlier, when nobody checked the timber, the slab, and the room as a single system. Most site teams miss this point. The floor is not just a product. It is a balance between material moisture, slab moisture, and ambient moisture.
What to specify on the order
Ask for the timber moisture content for the delivery batch before it goes to site.
Require slab testing, not visual judgment. Use a calcium carbide result under 2.5% moisture content or an in-situ RH reading below 75% before adhesive work starts.
Record room temperature and relative humidity for at least 72 hours before installation, during the install, and for 72 hours after.
Match timber moisture content to the climate. Use 9% to 12% in coastal conditions and 6% to 9% inland.
Allow proper acclimatization time. Expect 7 to 14 days on the coast and 3 to 7 days inland, with daily moisture checks until the readings stop moving.
Build in expansion gaps that suit the site, about 12 mm to 15 mm per 10 m width on humid coastal jobs and 8 mm to 10 mm per 10 m width inland.
Specify the right barrier or adhesive system if the slab is still borderline, and do not let anyone gloss over underfloor heating.
If the floor is a natural finish, it will keep reacting long after the installer has left. The job is to meet the timber before the house traps it, then make sure every moisture reading says the same thing.
Join the conversation