


A homeowner in Parkhurst once showed me a microcement floor that looked like a road map of the N1. Hairline fractures ran from the kitchen island to the patio door, perfectly replicating the cracked screed beneath. She had paid R680 per square metre for the finish, plus sealing, on the assurance that microcement would “seal everything in.” Two Joburg summers later, the building’s seasonal movement had opened every original crack in the substrate, and the thin cement layer had simply come along for the ride.
Microcement is a decorative skin, typically 2mm to 3mm thick, that offers the visual of polished concrete without the mass. It is not a structural repair. When the surface beneath it breathes, shifts, or cracks, that skin has no choice but to record the motion. The seamless aesthetic becomes a liability, exposing rather than concealing the pathology below.
Why the Substrate Always Wins
The physics are blunt. A 2mm cementitious coating has negligible tensile strength of its own. It bonds to what it touches, moves with what it follows, and fails when that substrate fails. Contractors who pitch microcement as a cover-up for defective tiles or cracked screed are selling appearance over performance. The buyer discovers the gap when the first winter contraction cycle opens a new line across the lounge floor.
The failure modes follow predictably from the substrate condition. Existing cracks in screed propagate upward through the microcement layer, a process called reflective cracking, made more visible by the finish’s smooth, continuous surface. Delaminated tiles or hollow screed create voids where the microcement lacks support, leading to impact damage or flexural cracking. Moisture trapped in a damp substrate vaporises beneath the sealed surface, producing blisters or efflorescence that stains light-coloured finishes. Rising damp pushes salts through the thin coating, leaving white deposits that no amount of cleaning removes.
In Cape Town’s winter-damp conditions, I have seen microcement applied over tiled floors where the original adhesive had begun to fail. The new finish looked immaculate for six months. Then the hollow spots under the old tiles telegraphed through as subtle depressions, and foot traffic started the chipping at the high points. The homeowner faced a choice: live with the blemishes or strip everything, old tiles included, and start again.
The Diagnostic Work That Gets Skipped
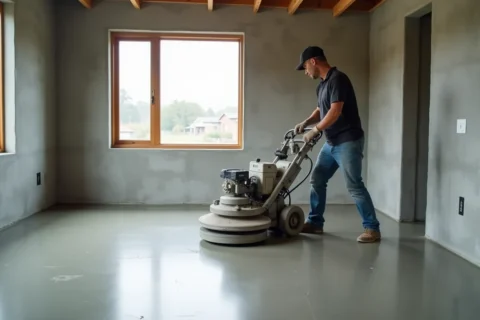
Most microcement failures in South African renovations trace back to inadequate substrate assessment. The temptation is strong, particularly in retrofit projects where the client wants to avoid the cost and mess of tile removal. A quick grind, a sweep, and the first primer coat goes down. This is where the job is lost before the microcement ever touches the surface.
Moisture content testing is non-negotiable. For cementitious screeds, a Tramex CME4 meter should read below 4%, or an in-situ probe should show relative humidity under 75%. In KZN’s humid coastal belt, I have seen contractors skip this step and pay for it with bubbling that appeared within weeks. Calcium chloride tests, run to ASTM F1869, quantify moisture vapour emission rates and should be specified on any ground-floor or basement application.
Adhesion testing is even more important when microcement is proposed over existing tiles. An Elcometer 106 pull-off test, run to ASTM D4541, measures whether the substrate will hold. Reputable microcement manufacturers specify a minimum tensile adhesion strength of 1.0 MPa for the substrate itself. If the old tile adhesive or the screed beneath it fails at 0.6 MPa, the microcement bond is irrelevant; the failure plane sits deeper.
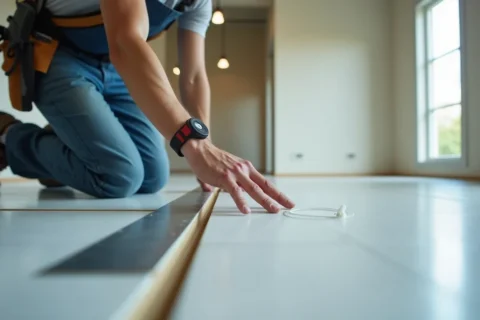
The simple tests get ignored too often. A chain drag or hammer tap across the full surface area identifies hollow tiles or delaminated screed in minutes. Any area that rings hollow needs removal and reinstatement, not a skim coat of hope. A two-metre straightedge or laser level checks flatness. Microcement will not self-level, and deviations beyond 2mm over that span show through the finished surface as shadows or ripples.
Contamination checks complete the picture. Old sealers, curing compounds, oil residues, or paint films act as bond breakers. Water bead tests reveal where the surface repels rather than accepts contact. Solvent wipes lift what should not be there. The primer specified for the microcement system must match the actual condition of the surface, not the condition the contractor wishes were present.
When Cracks Move and When They Do Not
Not all cracks are equal, and misdiagnosing the difference is expensive. Static cracks, from shrinkage or early-age curing, can be repaired and overlaid. Dynamic cracks, from ongoing structural movement, thermal cycling, or foundation settlement, will defeat any microcement application that bridges them.
The repair protocol for a static crack is mechanical and chemical. Chase the crack to a V-section, 6mm to 10mm wide and deep. Clean out all dust and loose material. Prime the exposed faces. Fill with a high-strength epoxy repair mortar such as SikaDur-52 or FOSROC Nitomortar, or with a rapid-setting polymer-modified cementitious compound compatible with the microcement system. For cracks wider than 3mm, crack stitching with stainless steel helical bars set in epoxy mortar adds structural continuity across the repair.
Dynamic cracks demand a different response. If thermal expansion or building settlement is ongoing, microcement should not bridge the gap. The crack must be treated as a movement joint, cut through substrate and finish alike, and filled with a flexible polyurethane sealant such as SikaFlex-1A that accommodates displacement. Where structural instability drives the cracking, a structural engineer must assess and specify remediation before any decorative finish is considered. Applying microcement over active movement is like wallpapering over a leaking pipe: the problem continues, and the finish is ruined twice.
Primers and Mesh Are Not Magic
Microcement systems rely on primers and reinforcement mesh to manage stress distribution and regulate substrate porosity. These components improve performance on sound surfaces; they cannot compensate for unsound ones.
Primer selection follows substrate type. Absorbent cement screeds or plaster need acrylic-based primers such as Cemcrete CreteBond or Sika Primer-3 N to consolidate the surface and control water absorption from the fresh microcement. Multiple thin coats outperform single heavy applications. Non-absorbent or contaminated surfaces may need epoxy primers or mechanical abrasion first.
Fibreglass or alkali-resistant mesh embedded between microcement layers distributes minor shrinkage stresses and limits hairline cracking within the finish itself. It does not bridge movement joints, prevent reflective cracking from substrate defects, or add structural capacity. Treating mesh as insurance against a bad substrate is a category error that ends in callbacks.
The Real Cost of the Shortcut
A recent project in Bryanston illustrates the arithmetic. The homeowner received two quotes for a 45-square-metre ground floor: R28,500 to remove failing tiles and re-screed, then R30,600 for microcement application; or R32,400 to apply microcement directly over the existing tiles, “saving” the demolition cost. She chose the second option. Eighteen months later, reflective cracking, hollow-spot depressions, and efflorescence had made the finish unsalvageable. The strip-out and restart cost R67,000, including removal of the microcement layer bonded to the old tiles. The “saving” had multiplied the true cost by 2.3 times.
For builders and finishing contractors, the reputational damage runs parallel. A microcement failure in a visible residential project generates more negative referral than almost any other finishing defect. The seamless aesthetic promises perfection and delivers the opposite when the substrate betrays it.
What to Specify Before the First Mix
If microcement is the selected finish, the specification should read as a sequence of verifications, not just products. Require moisture testing with documented results. Mandate pull-off adhesion testing to 1.0 MPa minimum. Specify chain-drag or hammer-tap survey of the full area, with hollow or delaminated sections marked, removed, and reinstated. Demand flatness survey to 2mm over two metres. Require contamination testing and compatible primer application to the microcement manufacturer’s written specification.
For crack assessment, specify structural engineer review of any crack showing displacement, stepped edges, or active widening. Require movement joint detailing where dynamic cracking is identified. Prohibit microcement bridging of expansion joints or control joints without isolation detail.
The product specification itself should name the microcement system, primer, mesh, and sealer by manufacturer and product reference, with application to the manufacturer’s current technical data sheet. Generic “or equivalent” clauses on microcement systems invite substitution with incompatible materials.
The Verdict
Microcement is a sophisticated finish that performs beautifully on a stable, prepared, verified substrate. It is not a repair material, a levelling compound, or a concealment strategy for failing surfaces. The seamless look that sells the system becomes its own evidence when the substrate moves. There is no grout line to interrupt the crack, no tile edge to disguise the fault. The finish follows the floor, faithfully, inevitably, and visibly.
Specify the diagnosis before the decoration. The R800 saved on moisture testing or the hour skipped on adhesion checks will be recovered many times over in the first callback, the first complaint, and the first strip-to-substrate restart.
Join the conversation